
Let there be light!

Threading heddles seems to be an aspect of setting up a loom that many weavers find particularly tedious. I’ve heard a lot of weavers say that they wish they could have someone else thread their warps for them.
Personally, I find this part of the weaving process to be rather meditative, as well as a good mental exercise. But it does require being in the right state of mind, and there are several things that I have found to be helpful in getting to that place. Physical comfort is key - if your body is unhappy your mind won’t be able to settle into a relaxed state.
It makes a big difference if you can find a way to sit as close to the front of your heddles as possible, and to be positioned where you are at eye level with the eyes of your heddles. Depending on your loom, this might involve removing the breast beam and the beater, sitting on a low stool or propping up your shafts with a thick book or yoga block. Anything that you can do to ensure that you are sitting in a comfortable position and at the right level will be well worth the effort involved.
And then there is the all-important lighting. You will want to have a very clear view of your cross in your lease sticks, which should be right behind the last of your shafts, and also good light inside your shafts, where you will be working as you thread your heddles. This can be a rather dark space, particularly if you have a castle on your loom that blocks light from overhead.
After years of trying to improve my lighting by using clamped-on lights or standing lights, I’ve finally got a built-in system that works beautifully. LED lighting strips can be bought in rolls in an adhesive form, but I have found that they tend to become unstuck over time and start falling off the castle. Better yet are permanent rigid strips that are mounted to the underside of the castle. They are called Under Cabinet lights, designed to be mounted underneath kitchen cabinets, but they work great for looms as well.

These are available at home improvement stores and hardware stores, as well as various online sources. I got my system through LEDwholesalers.com, and was able to put together my custom specifications, complete with mounting hardware, strip connectors and power sources for three looms for a little over $200.
Since you want to have good light both at the back of your castle, where you will be selecting warp ends from your cross and at the front of your castle, where you will be selecting and threading your heddles, it works well to have these LED strips running the full width of your castle, front and back.
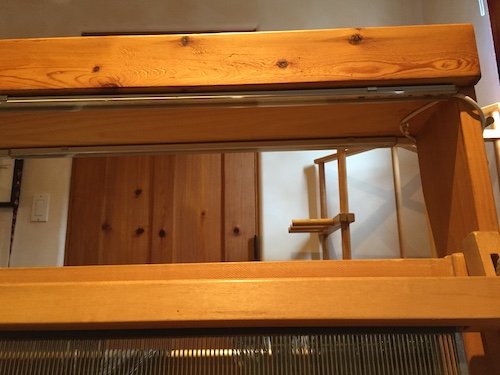
Here is the setup that I have for my 8-shaft Gilmore floor loom -

The power source plugged into an outlet at the side of the loom…

…which leads up to an inline switch, which then connects up to the LED strips.
LED strips of various lengths are connected together to end up with the length that fits the width of your castle and are attached to the castle with mounting clips -
The strips that run along the front of the castle and the back of the castle are connected together with connector wires, and if necessary, are rigged up somehow to keep them out of the way - here with push pins, though something more permanent could be installed -

Having these lights on for threading heddles makes all the difference in the world!

Here are a few other helpful hints that I find make threading heddles nearly always error-free.
I pull out the heddles that I need for a particular threading sequence and separate them from the rest. If your shafts have flat metal bars that hold the heddles you can get these flat plastic clips to keep your working group from sliding back and mingling with the rest of the heddles. This also gives you a chance to look at your heddle bars to make sure that you have pulled heddles from the correct shafts.

After threading a particular sequence I double-check it to make sure everything is in order. If you have pulled out the right heddles from that full threading sequence instead of one at a time, the worst error you should find is that a couple threads are transposed and need to be reversed. This is so much easier to do than having to tie in temporary heddles. Once I’m sure a threading group is correct I tie them together with a slip knot. And then pull out the next set of heddles for the next threading sequence.
I think of every step in the warping process as an opportunity to find errors. The sooner you find them the easier they are to fix and the less stress you will feel. Nice relaxing music helps too.
I hope all your warps go on smoothly and are an enjoyable experience!
