
Weaving a Good Fold

As a teacher of doubleweave, what I get asked about more than anything else is how to weave a good fold. There are countless techniques in doubleweave and many reasons for using them, but easily the most common and functional reason is to be able to weave fabrics that are wider than the loom available.
It takes two shafts to weave a layer of plain weave, so it takes four shafts to weave a doublewidth cloth in plain weave. This is generally woven with one shuttle at a time in the order of top layer, bottom layer, bottom layer, top layer, like a letter C or a closed book. The side that you start your shuttle from is the open selvedge and the other side is the selvedge with the fold. I have lots of information on how this works in both my Doubleweave book, https://doubleweaver.com/doubleweave-book/ and in my online course Doubleweave on a 4-Shaft Loom, https://learn.longthreadmedia.com/courses/doubleweave-on-a-4-shaft-loom.

Ideally, when you finish weaving your cloth, wash it and finish it in whichever way you choose, and then open it up, it looks as though it had all been woven in one continuous flat layer. The challenge for many weavers is that the draw-in at the folded side causes the warp threads to be more closely packed together than in the main body of the cloth. Equally important is that your weft isn’t too loose at the folded selvedge, leaving little loops sticking out at the side of the cloth. Consistency is very important here - you want your weft thread to be gently touching the selvedge thread, but not pulling in on it. The mantra here is “snug, but don’t tug”.
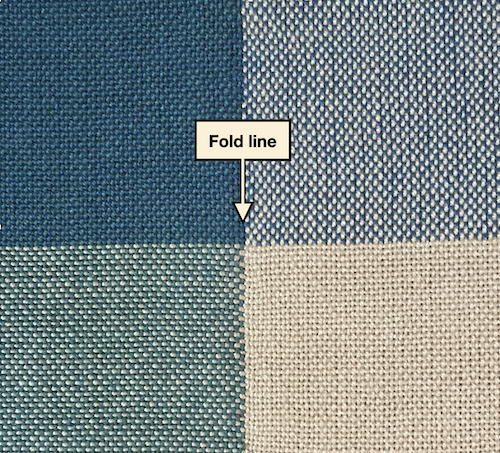
Dark warp on one layer, light warp on the other, woven in perle cotton.
I tend to weave a little more slowly when I’m weaving a folded cloth, and pay a little more attention to that folded selvedge. As I pull my boat shuttle through the shed my ring finger is gently touching the bobbin underneath the shuttle to feel when the weft makes contact with the selvedge thread. With practice you get used to what that should feel like and know when to give it a little extra nudge to connect with the selvedge thread and when to release your finger so that you don’t add any extra drag.

Mixed light and dark warps in both layers, woven in perle cotton.
I have a number of helpful hints for weaving a good fold. Use any of them that fit in with what you are weaving -
Most of us tend to get a better selvedge on one side than the other. Place your fold on your good side by starting your shuttle from the opposite side.
Dark colors will hide inconsistencies better than light colors.
A warp with lots of color changes will tend to hide inconsistencies at the fold.
Leave a generous angle on your weft in the shed before beating. This will allow the weft to travel over and under the warp threads without pulling in at the selvedges.
Beat on an open shed, and then change the shed immediately after beating.
Wind your warp forward frequently to help keep your two layers building up consistently.
Splice your weft tails together at the open selvedge rather than at the fold. It is also easier to have your splices on the top layer than on the bottom.
Always start a new weft from the same side as you originally started from. If you start a new weft from the opposite side it will throw your fold over to the other side and your fabric will not open!
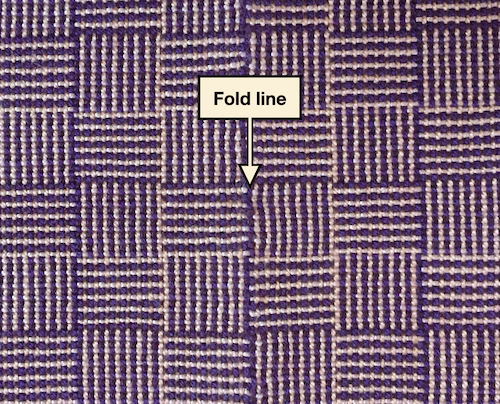
Doublewidth Log Cabin cloth - this requires throwing two picks of a light weft followed by two picks of a dark weft in a special sequence.
The same doublewidth Log Cabin structure woven in Harrisville Shetland creates a very smooth fold because of the fulling that occurs in the washing and finishing process.
If you have eight shafts available then any 4-shaft structure can be used for each layer of a doublewidth cloth. There are special considerations for how this must be drafted because one of the layers is upside down and backwards on the loom relative to how it will be oriented when the cloth is opened up. Most weaving software programs now have a function for entering a single layer threading, which the program will transform into a draft for a folded cloth. It’s still good to understand how to do this yourself, and I have a lesson on how that process works in both editions of my Doubleweave book.

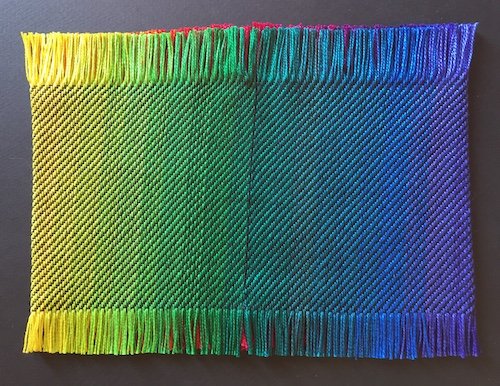
4-shaft straight twill woven doublewidth on 8 shafts in perle cotton. All the color variations in the warp, in addition to the grouped warp threads of the twill structure make it difficult to tell where the fold occurred.
4-shaft herringbone twill blanket woven doublewidth on 8 shafts in Peace Fleece wool. The fulling that occurred in the washing and finishing process made the fold line nearly undetectable. This blanket is a project in the first edition of my Doubleweave book.
Detail of a tripleweave tablecloth woven in cottolin. The center panel is a 4-shaft Bronson Spot structure and the outer two panels, which are the same width as the center panel, are each a 2-shaft plain weave. The change in structure from one layer to the next makes the fold line disappear. This is a project in the Revised & Expanded edition of my Doubleweave book.

In addition to these general tips for weaving a good fold, there are several mechanical adjustments you can make to help counteract the draw-in that may occur at your selvedges. Choose just one of these at a time to work with - combining two or more of them together will create too large of a gap at your fold that will be difficult to bring back in line.
If you are someone who likes to weave with a temple, you can use this by making sure that the teeth of the temple go through both layers of your cloth.
You can spread out the outermost dent in your reed to create a more open spacing at the fold. For example, if your sett is 4 threads per dent in your reed, open up that outermost dent to have 2 threads in two dents. This will tend to equalize the spacing at the fold to come out the same as in the rest of the cloth.
This is my favorite adjustment. I use it frequently and tend to get very good results with it. Wind your warp and set up your loom as usual, threading the heddles, sleying the reed, and tying on to the front apron rod. Then cut two lengths of fishing line that are a yard longer than your regular warp. Tie these on to your front apron rod at the selvedge where your fold will occur. Sley them through the outermost dent on the folded side, so that you now have two extra ends in that last dent. Thread them through the last two heddle eyes that have regular warp ends threaded in them. Hang them off the back beam and hang a good solid weight from the two ends of fishing line together as one. I generally use 18 lb. fishing line and hang about a half-pound of weight from it. Then you can weave as though these ends weren’t even there. They will go up and down along with the warp ends that they are threaded with. The firmness of the weight on the fishing line will prevent draw-in from happening and keep the spacing in the reed consistent with the rest of the cloth. As you wind your warp forward keep an eye on the weights - you will need to move the weights down as they travel up toward the back beam. When you finish your weaving be sure to remove the weights before releasing the tension and cutting off your cloth so that the weights don’t crash to the floor! Once your cloth is removed from your loom you can just pull out the lengths of fishing line. You may find that there is a little extra gap where the fishing line was, but this will generally close in once you wash and finish your cloth.
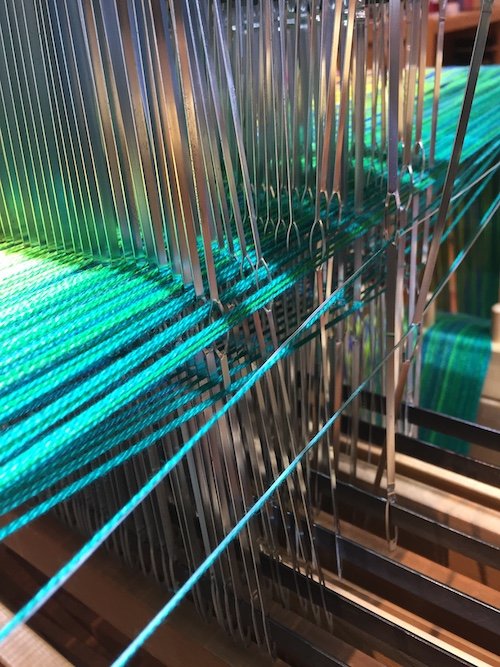
Fishing line doubled up with the outer two warp ends.

The fishing line keeps the selvedges straight and even and prevents draw-in from occurring.

Here I am using two ends of fishing line at each selvedge to weave a tube. I have 500 gram spools of linen yarn hanging off of each pair, but any kind of weight that you want to use will work just fine.

The end of the warp is arriving at the back of the heddles, but the weights are still hanging off the back beam.

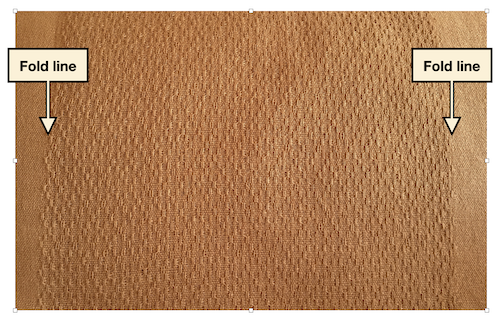
Sample from tubular warp woven in perle cotton in a 4-shaft twill in each layer. On this photo the cloth is adjusted to shift the fold lines to the center of the cloth. You can see the pieces of fishing line extending out the top of the sample.
Sample with the pieces of fishing line removed. You can see that there is a little extra space where the pieces of fishing line were.

Sample after washing, drying flat and steam pressing. The fold line is largely undetectable now that the cloth is finished.
This technique using the additional lengths of fishing line can be used at both selvedges if you want some extra help with your selvedges at the open side as well. In fact it can be used with any weaving in a single layer too. For the tripleweave tablecloth illustrated above I used three lengths of fishing line at each selvedge - one for each layer.
Remember that finishing does wonders for allowing your threads to even out, particularly in structures that have grouped warp threads, such as twills. Wool and other animal fibers will do even more wonders as they full and allow the fibers to bloom out and soften the appearance of the weave structure.
And remember that you will be more sensitive to any inconsistencies at your fold lines than anyone else. If you resist the temptation to point out any flaws in your weaving, chances are that no one else will even notice them!